[Since
writing much of the review below in 2007 of the Canon HV20, Canon introduced
the similar HV30 as a replacement, followed by the HV40. Changed with
the HV30 was the raising of the
zoom control higher above the body surface, making the body color black,
improving the off-angle viewing performance of the fold out panel
viewfinder, adding 30P shooting capability, adding a higher-capacity
battery choice (the NB-2L24H, which can also be used on the HV20, but
to fully recharge it on the HV20 it must be removed after the first charge cycle and
placed again on the HV20 for a
second charge cycle - and this large battery makes it very difficult to
use the eyepiece viewfinders on these camcorders since they do not
extend backward or tip upward), and adding "Vixia" to
the name. Changed with the HV40 is the ability to assign a selected
commonly-used function to a single button, a useful addition.]
INTRODUCTION
--
Canon
certainly "got their act together" on this one - the HV20/HV30/HV40 is one
heck of a good inexpensive small 1-chip HD (high definition) camcorder!
LENS
CHARACTERISTICS
--
The lens at the wide end is superb even at the widest f-stop, producing a very sharp image to the corners. Zooming about 1/2 way through the (marked) zoom range on the VF (viewfinder)
zoom scale away
from WA (wide angle) gradually introduces a touch of CA
(chromatic aberration) toward the image corners, but with nothing very bad and with nothing else to complain
about. Zooming to about 3/4 of the way toward the tele end (as indicated
on the VF zoom scale) introduces
still more CA, but it is acceptable, and sharpness, while declining a bit,
is still very good. Beyond that point, the image quality declines rapidly
(the CA is excessive at the long end and sharpness, especially toward
the image corners, isn't all it should be). Since I prefer WA, these characteristics aren't a "deal breaker" for
me and in
the zoom range that I use most of the time, the picture sharpness is
astonishing when viewed on a very sharp 42" LCD TV at 6.5',
especially when it is compared with any SD (standard definition) camcorder
output and with anything sold near the absurdly low price I paid for the HV20.
PICTURE
CHARACTERISTICS
--
The picture
has excellent
color, even with AWB (auto white balance), although the picture is a little light with the
stock picture settings. Contrast appears good, although it can be somewhat
high for some subjects without adjustment - and highlights burn out easily, a
common problem with one-chip camcorders. Those and some other picture characteristics can be modified slightly in the
menus for improving the picture when needed.
There are no
evident oversharpening effects or MPEG-2 compression artifacts, and it is surprising
that even with the high picture compression used for putting an hour of HD
picture (plus sound) on a standard small Mini-DV tape, commonly seen
compression artifacts with motion do not appear (at least that I have seen so
far on a good 42" 1080p HD TV). The picture remains sharp, smooth, and
with good color down to roughly medium-bright interior light levels, below which
(rather abruptly), "golf-ball" noise appears and the
color loses its purity. Unlike with Mini-DV camcorders,
it can be useful to drop the shutter speed of the HV20 to 1/30th second,
with little resulting image degradation. With minimal camera or
subject movement, even a 1/15th second shutter speed can look good.
Occasionally, with jerky or rapid camera motion, CMOS rolling shutter
picture distortion can be seen. To my surprise, the 24P mode is not
so ugly with
motion as earlier versions (30P) that I had seen. It also appears to
increase the camcorder sensitivity a bit, an advantage in fairly low light (where the HV20 is better than I expected it to be, although it is a
camcorder that definitely does not perform well in very low light levels).
"24P", however, is not truly 24P, and editing with it can be
tricky. The
"cine look" mode (which "jiggles" contrast, saturation,
etc. to simulate the look of film) helps with skin color under some
lighting conditions that otherwise result in a too-red or harsh image - but for
general shooting, I find that video shot in this mode is too
low in contrast and color saturation to be pleasing. "Cine look" mode appears to smooth out motion in 24P mode, but at the price of
softening the image considerably during motion. (See below for more on my
preferred settings for optimizing the picture characteristics.)
SOUND
CHARACTERISTICS
--
The built-in microphone sound quality is barely acceptable since some undesirable camera
body handling noises, lens zooming hum, and prominent wind noise can be heard in the recorded audio. Unfortunately, when
adding an external microphone, the auto
"wind" LF (low-frequency) cut filter cannot be enabled - and I like to shoot nature here and
the wind is almost always blowing. I tried adding
a stereo Sony 908C external microphone to the camera using a simple
isolation bracket which solved the zooming noise problem, but I could not
completely solve the handling noise problem or
the serious wind noise problem even with with two layers of foam windscreens
(one a Radio Shack foam wind screen, part number 33-373A) with
additional multiple layers of differing types of open cell
foam wrapped around them. Adding the Rode "Deadkitten" "furry"
directly over the 908C's own foam windscreen (part number RD-1, the one that comes with
the Rode StereoVideoMic - but it can be ordered separately for
about $25) did solve the 908C's wind sensitivity problem, but it continued to be difficult to reliably
isolate the mic from camcorder handling noises. Mounting the mic on a
still camera "L" handle flash bracket (which also aided with
hand-holding the camera) helped, but using a bracket assembly I made (described
here)
solved the handling noise and hand-holding problems I had been having. I
tried, without success, my
two mono short shotgun Sony microphones (with screens and air conditioner foam wraps) mounted
at diverging angles on a bracket while using a Radio Shack 1/8"
dual-mono-to-stereo adapter (RS part number 274-375, $4.99) and a RS
1/8" right angle stereo adapter to get the cords where I wanted them (RS part number 274-372, $3.99).
The next mic I tried was my mono Sennheiser MKE-300
short shotgun microphone with its own foam wind screen plus a Rycote "furry" over that, all
mounted on a pair of isolators to raise the long and fat (but light) microphone
package high enough so that it was out of the visual range of the lens
zoomed wide with the Raynox .66X WA lens converter on it. This solved
all the problems except that some camera handling noises remained
- but this solution introduced another problem. With the microphone's
mono plug inserted into the HV20's stereo input, I got a mono audio image that hung
noticeably toward
the left side. I was able to achieve a centered mono image by adjusting
the channel balance during editing - and also by using a Radio Shack 1/8"
mono-to-stereo adapter (RS number 274-374, $2.99). I eventually replaced
the MKE-300's mono plug (which did not fit sockets reliably anyway) with
a stereo plug with the "hot" wire connected to the both the plug's ring
and tip. I added the right angle adapter to get the wire where I wanted it and also to better protect the camcorder
socket from possible damage from side force due to having a long adapter sticking
out the side of the camera. Better yet, I suppose (if one of these
could be found), would be to put a stereo right angle plug directly on
the microphone cord (wired as above). I looked at various solutions for
converting the mono sound from the Sennheiser to a simulated stereo sound, but I was not happy
with any until I tried one of my own (described
here),
which works reasonably well. I have not tried Canon's own DM-50 mic for
this camcorder, which at least has the advantages of being compact and
of being powered directly from the shoe (no external signal wire is needed,
and it powers up/down with the camcorder - and that mic may be useable
with the $50 Rycote Mini Windjammer "furry"). Canon's DM-100
comes with a "furry", but unfortunately, it doesn't fit the
HV20/30/40's hot shoe. I recently tried the new Rode Stereo VideoMic, and this
mic appeared
to work acceptably well in every respect, although it is relatively
expensive, bulky, and heavy. This mic's response is smooth, but it is somewhat
bright and it has some tendency toward producing sibilance with some
voices. It comes with a reasonably effective "Deadkitten" wind filter and 8 spare suspension
rubber bands. Very recently, I found my old-but-much-liked Canon ZM-100 that proved to be excellent in sound and also
in its freedom from handling and wind noises (with some
air conditioner foam over the mic's own foam screen). It does require an added
awkward custom 6v. battery power supply box for it to work, though. If you want to hear
what these microphones sound like in a rough comparison using familiar
material (but without wind), go to YouTube at http://www.youtube.com/watch?v=dFQDItWK4Ng
(click on the "HD" button if you care, but the visuals are
"throwaway"...;-). I also have a comparison of the five
microphones here.
The conclusion for me is that the most
reliable and trouble free microphone under a variety of conditions is
the Sony 908C - but I was surprised by how
nearly alike the five microphones I compared sounded. Also, I found that the HV20/30/40's AGC (automatic gain control) does not always
prevent wave-form clipping distortion, although if likely clipping is
noted when viewing the camcorder's audio meter, a 10db pad can be
switched on in the camcorder's menu (and/or on the Rode microphone), or
you can use manual audio level control. I do miss the Sony VX2000
microphone and audio which, with the Radio Shack perfect-fit foam windscreen
(RS
number 33-373A), was free of all problems (when using AGC) and it just plain produced
excellent ambient
stereo sound
for me without fuss under almost all conditions. When using the larger of the two
batteries that were originally available for the HV20, I heard a
frequent "thunk" in the audio. I recognized this immediately
as being caused by the battery moving in its mounting area - and it was
cured by adding a patch of masking tape four to five layers thick to the
back
of each battery. The patch extends a tad short of the terminals, some
short of the depression at the other end, and just short of both sides
(clearing the mounting cut-outs).
Afterward, I
put the cap on each battery with the opening (indicating charge state)
over the side opposite from the blue label and filled in the exposed area
with a ball-point pen (blotting it afterward). I also added
a strip of masking tape along the edge of the tape compartment,
extending very slightly into the compartment. This reduces the door
play, which can cause some noise as the door moves when using the side
grip. Also, be
very
sure to switch
from the default mini-plug
"AV" output to the alternative "headphone" output in the menu
when using headphones with the HV20/30/40!
RECORDING
MEDIA
--
Using
HDV tape based camcorders has image quality advantages over the AVCHD memory
card and hard drive recording systems used by many camcorders. See
this site, at
www.camcorderinfo.com/content/Canon-HG10-Camcorder-Review-33146/Performance.htm#
for
an interesting comparison between the image quality of the standard 17 Mbps AVCHD
memory card and hard drive acquisition format and the 25 Mbps HDV tape
acquisition format with camcorders using the same sensors and lenses,
the Canon HF 10 and Canon HV30.
The compression system used for tape is still generally preferable for
image quality and for editing ease and practicality, and tape is also
more practical for the archiving of video files, especially the source
material. Even good editing programs like Vegas Pro can bog down with AVCHD unless the hardware
is VERY able. AVCHD has a
way to go yet, with only very specialized (and expensive) hardware
(and/or transcoding software) able to handle high data-rate AVCHD files
well, which makes me feel sorry for those who
are tempted by the appealing convenience of memory card and hard drive based camcorders
- unless
efficient editing and easy long-term archiving are not desired. Unfortunately, the first tape I tried
was a defective one, and it pointed out a potential disadvantage of
using tape for HD: dropouts (and an HDV MPEG-2 dropout causes the picture to freeze for
about a half second, although this is usually caused by only one or two
defective frames which may sometimes be easy to work around during editing). Many people report
trouble free use of standard
Mini-DV tapes of various brands (and even with mixing brands, which I
would never do), and I later had
relatively few problems with the same kind of tape I had had many dropouts
with. This experience did give me the opportunity to (painfully...) learn the
differences in how three
HD editing programs handled problematic HDV source
material.
Higher grades of tape in the Mini-DV cassette format are
available, but the prices are considerably higher - but for safety I will now use
tape specifically designed for recording HDV with its MPEG-2 format,
which is much more sensitive to the effects of tape dropouts than Mini-DV,
and I now have
a supply of Sony
DVM-63HD tapes (and Sony HDM-63VG has also been recommended to me as a
less expensive alternative). DVD, memory card, and hard drive in-camera recording
systems do avoid dropout problems, but for me, their several disadvantages may
outweigh
their one
advantage.
A few
Canon AVCHD camcorders that use memory cards and/or
hard drives instead of tape while recording the picture and sound have
arrived that take advantage of a higher data rate than previously used
in compact camcorders (24 Mbps instead of 17Mbps, almost the same data rate that HDV uses, 25
Mbps, but with a more efficient
compression type and with a full resolution
of 1920x1080 instead of
HDV's 1440x1080). Unfortunately, the eyepiece viewfinder has been
dropped from two of three of these camcorders to cut costs (this is unacceptable
to me). Editing this high data rate is not easy, and requires the use of
a very fast computer. Edited
videos can be archived on multiple hard drives that are properly
maintained, and AVCHD red-laser DVDs can be authored for convenient viewing using
standard cheap DVD blanks and standard DVD writers. HDV videos can also be
converted to AVCHD with very little loss in quality (with suitable
software, such as Sony Vegas...) and authored using
standard DVD blanks and writers, also saving the costs of Blu-ray writers and
disks. These disks must be played on
an AVCHD-compatible Blu-ray player for viewing, though.
MANUAL
CONTROLS
--
Manual
controls can be accessed after the slider on the camcorder upper rear
left side is moved from the full "Auto" to the "P"
position. MF (manual focus) is done by pushing a small button next to
a "roller wheel" near the front and turning the roller (the backlight
compensation button is just
above it). Pushing the MF button and holding it more than two seconds
moves the lens to infinity focus, but only for the zoom setting already
selected (any zooming defeats this setting). The "edge peaking"
viewfinder MF aid appears
quite helpful (accessed at the bottom of the viewing screen or in the
menus) - but I found the 2X magnification option on the
coarse-grained screens less useful than the peaking function alone,
available separately in the menus. There are also useful "lock-and-shift" exposure and sound recording level controls (using the tiny joystick on
the camera back), which serve well enough as substitutes for fully manual
controls (although their operation can be very confusing). "Zebras
Stripes" can be activated in the menus for the indication of areas of overexposure, and a sound level meter can be activated in
the viewfinders. A microphone pad can be activated if needed for
additional control over very high audio levels.
AUTO
CONTROLS
--
The
HV20/30/40's auto controls work well, and for some people, the
upper left rearward
switch may be left at the "Auto" rather
than the "P" position (but this is not my choice for the best
picture...). The "instant AF"
and "standard AF" modes give slightly different choices for how
the autofocus works. I prefer to leave the camera in "I-AF" mode since the slower standard
AF mode can't keep up with moving objects very well (including me with the
camera) and it hunts
for correct
focus more often than when in the "I-AF" mode. Aperture
Priority (you select the aperture, the camera selects the shutter
speed) and Shutter Priority (you select the shutter speed, the
camera selects the aperture) auto
exposure modes can be selected in addition to Program Auto (the camera
selects both aperture and shutter speed), and
all of these can be overridden using the "lock-and-shift" manual
exposure control (which I now use more frequently, judging exposure with
the eyepiece VF and the zebra stripes). Some added manual reduction in exposure
may be useful under almost any condition to avoid loss
of the appearance of image "richness", the loss of highlight details of light-colored subjects,
and the "blocking up" of detail in highly saturated yellows, oranges, and reds. I prefer using shutter-priority,
using 1/60th second when shooting moving water, and 1/100th or higher for everything else
outdoors unless the shutter speed blinks indicating that it needs to be
adjusted to another shutter speed for correct exposure (image diffraction
effects at the smallest stop available, f8, are not really a problem,
and the lens is good at its widest stops).
Some of the special program modes can improve
the picture characteristics under specialized conditions, but I very
rarely use these. My
current preferences for setting the picture bias controls in the
"Custom Settings" are these: sharpness always at "o", exposure
always at "-", contrast at "-" on sunny days and at "o" on cloudy days, and color depth at "o" unless there are saturated
yellows, oranges, and reds (then
I use "-"
to prevent these colors from blocking-up,
removing detail in these areas). I also use color depth set at
"-" when there is skin tone in the sun, or at "+" if the light and
color are "flat".
In addition to the picture biasing adjustments in the menus, there are
also selections for smoothing skin tone and for simulating a "film
look". Selecting
the custom settings locks out skin tone smoothing. Using "cine
mode" results in a picture that looks too flat and lifeless
for my tastes (although this mode can also be modified with the custom
controls and manual exposure shift). I use DWB (daylight white
balance) outdoors in sunlight and SWB (shade white balance) in shady/cloudy-conditions,
or I set
the adjustable and lockable white balance for the best color balance,
and also for avoiding scene-to-scene color balance variations. For me, the
picture with the body side switch set to "Auto" mode is not what I
like, but that
is what the biasing controls, the aperture and shutter priority modes, and "lock-and-shift"
modes are for, available with the body switch set to "P".
ADDITIONAL
COMMENTS
--
The menus are fairly easy to operate from the single button and
"joystick" on the rear (many of the options are removed unless the slider on the camcorder upper
rear left side is moved to "P"). The lowest level items are
accessed by pushing the button and making selections with the joystick
(pushing it in to fix them). The second level is accessed by holding in
the button longer than two seconds (a neat system - but sometimes
confusing in practice). Other options are accessed with the joystick
directly, pushing it up or down for selection, then left or right to
change the settings, but I find this VERY confusing in practice, simple
as it sounds. There are outputs for
FireWire, HDMI, component video, stereo sound, and headphones - and a
stereo 1/8" microphone input jack. I thought I would miss a Lanc input, but
Canon has provided not only a nice zoom control (unusual for a small
camcorder), but one with an unusually slow lowest speed available - very nice! And,
there is a menu selection for choosing a fixed zoom speed (including the
slowest) so that you can
"mash" the zoom controller and still
get a predictable zoom rate. The optical stabilizer is excellent, but
since I now shake rather a lot, I also use a handle that attaches with a
quick-release mechanism to the bottom of the camera. It extends far out to the left side of this small and light camera,
with a folding bar attached to it that rests on my left shoulder (photos
are here).
Added
to that are a firm grip with my right hand - and with pressing the top
of the camcorder viewfinder to my eyebrow, I have four points of support.
(I also have a "tank" of a professional fluid-head video tripod, but I dislike
using it.) As a further method of image stabilization, I sometimes now also use
ProDAD
Mercalli Expert,
a software stabilization program (for more on that, go here).
A standard shoe for a light or microphone is also supplied on
top of the camcorder, hidden under a snap-off (and easy to
lose) cover (I leave it in my video gear cabinet so I know where it
is...;-). Data is transferred by FireWire to a computer for
editing, and some very inexpensive editing
programs will now handle the HDV
MPEG-2 material. The edited video can be transferred back to the camcorder
for archiving on tapes, and HD disks can be made on Blu-ray
blanks using some editing/authoring programs with appropriate burners
(and AVCHD conversions from the HDV files can be made and written to HD
disks using standard writers and DVD blanks - but both Blu-ray and AVCHD
disks need appropriate Blu-ray players for viewing). Surprisingly good
SD DVDs can also be made from the HDV files. For more on basic editing
with Sony programs, go here.
SOME
COMPLAINTS
--
The HV20/30/40 has the usual
full-auto-everything/program/aperture-priority/shutter-priority
selections, but no fully manual exposure mode. Its
"lock-and-shift" exposure mode can serve well enough for most
manual exposure needs - but I still
haven't gotten used to navigating quickly and easily the manual exposure level and sound level
adjustments with the joystick (I always seem to push
the control the wrong way and instead of modifying a setting, I wind up
in a different function). I now favor often leaving the exposure control
activated and using the eyepiece VF to judge exposure, and this
has worked well. The barely adequate eyepiece VF is fixed in position and does not permit
extending it or tipping it up (although it does easily clear the small battery packs
originally available for this
camcorder). The camcorder and
VF eyepiece are (unfortunately for me) not left-eye friendly. I found it useful to put small
sticky-backed bits of soft material at the VF top corners to protect eyeglasses from the hard VF surround material. The swing out VF panel
screen is coarse and the apparent video image brightness changes
considerably with viewing angle changes, making framing difficult and focus and exposure evaluations
with it almost impossible outdoors (the HV30/40 panel is better). The HV20/30/40 VFs show quite a bit less than the full image recorded
area (said to be 20% less, which makes it necessary to look carefully at
what is in front of the camcorder to avoid shooting unwanted things - like your own shadow when a WA converter is installed...). Most of the various
available VF grids and lines are too distracting (although using the single
grey horizontal line choice may be useful when leveling the camera).
Unfortunately, the camcorder's VFs do not serve very well as monitors
to make reliable framing and picture adjustments on location easy, and this can be
somewhat frustrating when the footage is viewed afterward (especially
since modifying MPEG-2 footage in post more than once is not desirable
due to the resultant loss in quality from additional compression
passes). Other than using the often-OK
settings given under "Picture Characteristics", above, I have
found no "one set of settings does all" way to insure that
most footage shot with this camcorder will be ideal (unlike with the
Sony VX2000 - although much of this problem can be attributed to
unavoidable differences between a good three-chip camcorder and a good
one-chip camcorder). Properly setting up and using the eyepiece VF can
help, especially if the "zebra strips" are turned on to
indicate exposure levels in the lightest areas. Most of the HV20's
controls are surprisingly awkwardly placed and awkward to use (the new
HV40's assignable button may help with this). Handling the camera while taping can result in noise
being picked up by the built-in microphone and zooming produces a
low-level hum in the audio, but using an external microphone even with an
isolation system may not solve these problems completely (starting and
stopping taping, for instance, can both result in a "klunk" in
the audio). Unfortunately, the "windscreen"
(really only a low-frequency audio filter...) cannot be turned
off in "auto" mode when using the internal microphone, and it
cannot be turned on when using an external microphone in "P"
mode. Making some choices
locks the user out of some other choices (this is
necessary for simplicity in the menu and operational organization, I guess, but....).
As mentioned above, the large cover
for the accessory shoe snaps off for removal, and it can be easily lost. Other covers on the
camcorder are attached with material that looks stressed when it is bent
to open the covers (one hopes that these hinges will last, but they do
appear to be durable...). Some
jacks/plugs are tiny and a bit finicky (and one cord with a tiny plug is quite stiff),
although I suppose that this is necessary to permit so many connections to
be made to such a small camcorder. Related to this is the unfortunate
necessity for manually switching in the menus from "AV" to "headphones"
since they share the same jack (although for most purposes,
"headphones" can be left selected). While commendably tape based, using even the highest quality Mini-DV tape in the HV20/30/40 risks dropouts, so expensive HDV-specific tapes
may be desirable (experience with this varies, and many people report reliable
results with cheap Mini-DV tape). The original battery selection for the HV20
was very limited, with the two largest ones
being almost identical in run time (and these did not have very long run
times) but a larger one is available for the HV30/40 that will fit the HV20
(although it
requires two charging cycles on the HV20 for a full charge), and a
larger one yet is also available, but it blocks the eyepiece viewfinder.
Also, while this
camcorder
may be inexpensive, the remote for it is unnecessarily tiny, weak in
signal output, and the camcorder receiving end is unfortunately placed under the
camcorder's lens, so the remote's operation is
not very reliable.
CONCLUSION
--
The above complaints notwithstanding, the HV20 (and HV30/40) can produce excellent
image quality and acceptable-to-good sound quality (especially if a good
external microphone is added), and for the money (or even considerably more), you
cannot improve
on its performance. The picture quality in good light is a huge improvement over
that of even the best Mini-DV (or any other SD camcorder format), and while it is well short of the very best broadcast
HD, it appears to me to be the equal of "average" HD
broadcast picture quality (at least when the HV20/30/40 is used
in the wide
angle half of its zoom range and in sufficient light levels), not a small thing for such an inexpensive and simple
camera. This camcorder is amazing!
THE
CANON HV20 WITH WIDE ANGLE LENS CONVERTERS
--
I
went through my shelves full of WA lens converters, trying them on
the HV20, and I was surprised how good four of them were, even in HD - but they
were all a bit less than perfect. One generic fisheye adapter of the many I
have is quite sharp and extremely wide (although it is not at all zoom-through), but my particular camcorder's
sensor is decentered top to bottom, so the cropped circular image is not
satisfactory without further cropping in post (the stabilizer should, of
course, be turned off when using these cheap fisheye lens converters, or
the cropped edge of the image will move around in the frame). The VERY wide
Sony ES-06 is slightly softer
in the corners at wide stops than the two less wide converters and it
has some slight CA
and a considerable amount of barrel distortion, but it is very
compact and light (although it is also not
at all zoom-through). The fairly
light-weight Raynox (HD6600) .66X is quite
good and it has the least amount of linear distortion, but it is not fully
zoom-through (it is good to about 1/2 the way toward the
tele end of the zoom range as indicated on the zoom scale in the VF) and at the wide end it is bettered very slightly by the Canon WD-58 in the corners at wide stops
(although that one is also not
fully zoom-through). (The WD-58 .7X was designed for the
Canon GL-1, but it was excellent on the various Sony 58mmfront-threaded
Mini-DV
camcorders - see comparison frame grabs at www.David-Ruether-Photography.com/WA-converters.htm
from various 58mm WA converters on
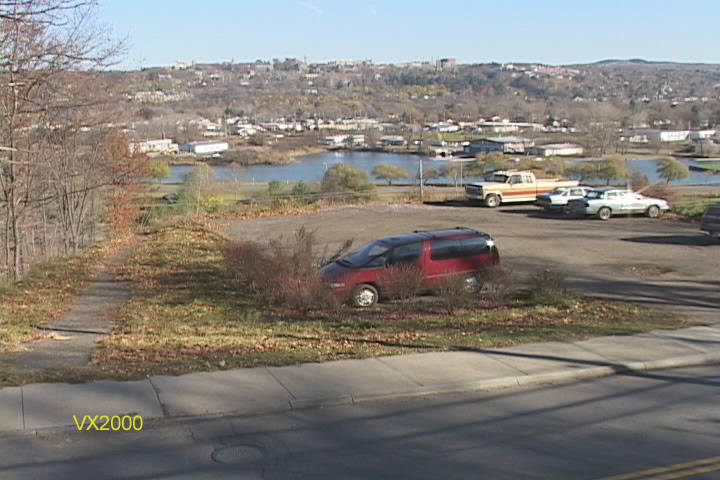
the VX2000.) The
WD-58 is rather large and heavy, and it has very noticeable barrel
distortion on this camera's lens (see the sidewalk in the frame grab below), so I now tend to favor the slightly wider
and considerably lighter Raynox .66X, which is also the only one that will accept a
filter and shade (I use a 72mm UV filter plus a 72mm WA shade from
the original 20mm f3.5 Nikkor lens). It may still be worth trying the $200 Canon .7X made specifically for this
camcorder, but the Raynox is more than satisfactory. I did
not try my Sony 58mm .7X WA or 1.7X tele lens converters since these are
FAR too large and heavy for use on the small HV20/30/40 camcorders (but they are
top-quality converters, and maybe I should try them just for fun...;-).
COMMENTS ON SOME
HDV EDITING PROGRAMS
--
COMMENTS
ON USING THE MERCALLI VIDEO STABILIZER PLUG-IN
--
SOME
FRAME CAPTURES FROM SOME HD VIDEOS I'VE PRODUCED USING THE HV20
--
SIMULATING
STEREO AUDIO WITH A MONO SOUND TRACK
--